Uploader
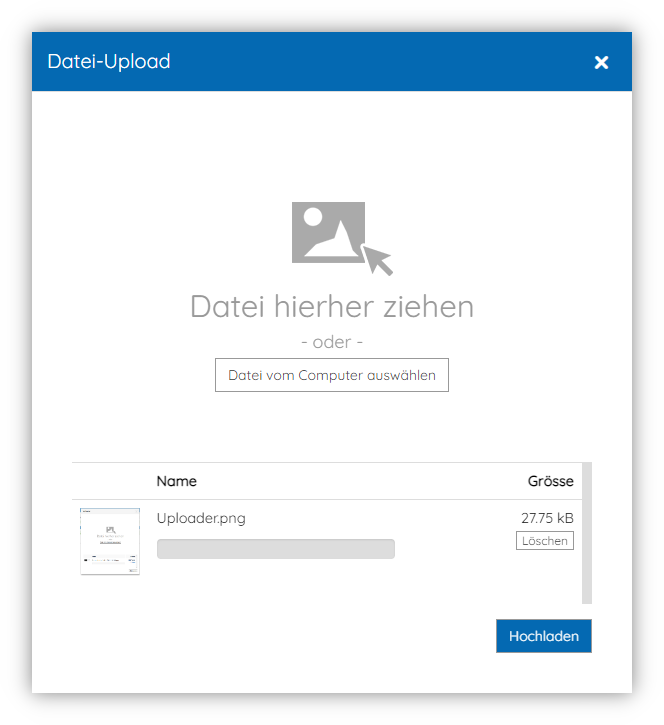
The Uploader provides the ability to upload files in Cloudrexx through an easy and intuitive user interface. It supports drag&drop file selection and previews queued images.
Integration
Basic
- Create a new instance of
\Cx\Core_Modules\Uploader\Model\Entity\Uploaderin your code. This should normally be done within the Frontend- or BackendController. - Directly set an upload target destination path using option
target-pathor implement a server-side callback-handler. - Use
Uploader::getXHtml()to fetch the generated HTML-input-code and put it into your template usingSigma::setVariable()
Example code for modules/<component>/Controller/BackendController.class.php
This example uses the \Cx\Core_Modules\Uploader\Model\DefaultUploadCallback class as a server-side callback-handler which will upload the files into the folder /image/content/ of the Cloudrexx instance.
Example code for modules/<component>/View/Template/Backend/Default.html
Folder Widget
Use the FolderWidget to interactively display the uploaded files before the server-side callback is being triggered.
Implement as follows:
Use FolderWidget::getXHtml() to fetch the HTML-code to insert into your Sigma template:
Update file list
To update the file list of the FolderWidget do register a client-side callback as follows:
Then update the file list in JavaScript as follows:
Modal vs Inline
By default, the Uploader will be opened in a modal window. However, it is possible to integrate the Uploader as an inline widget. To do so, do change the type as follows:
Button customization
Customize the layout of the HTML-button-element by setting any valid button-attribute:
Or add additional CSS classes as follows:
Image preview
When the Uploader is being used as an image selector, then it can be set up with a real-time image preview functionality on a selected HTML-img element:
Explanation of options:
| Option name | Description |
|---|---|
data-thumb-selector |
jQuery selector to identify the HTML-img element on which the selected image shall be previewed. |
data-thumb-max-width |
Width of the preview image |
data-thumb-max-height |
Height of the preview image |
Resume existing session
To resume an existing upload session, do pass the ID of the upload session as argument on object instantiation:
The ID of an existing upload session is available through Uploader::getId()
Use Uploader::isValidId() to verify an ID's validity:
Drop session
To clean up the user session after a successful upload, completed upload sessions can be dropped as follows:
Callback handling
Server-side (PHP)
Use server-side callback-handling to manually process & move the uploaded files into the desired target location.
To specify a callback you can provide a class which implements \Cx\Core_Modules\Uploader\Model\UploadCallbackInterface.
When the upload is finished the Uploader will call the
uploadFinished() method of the class with the specified arguments in the UploadCallbackInterface interface.
You can find a example for a callback in the
\Cx\Core_Modules\Uploader\Model\DefaultUploadCallback class. The Uploader injects the \Cx\Core\Core\Controller\Cx instance as a first parameter in the contructor so we don't have to use singeltons or global objects.
The method uploadFinished() should return an array with the location where the uploaded file(s) should be moved to. The array must have the follwing structure:
Pass additional data arguments
To pass additional data to the server-side callback method, do set them through Uploader::setData():
The data can then be accessed through the $data argument in the callback method:
Client-side (JavaScript)
The Uploader will call a specified JavaScript callback after the upload has finished and the user has closed the Uploader's modal window. The function should be available from the global window context. This function will also be called with an empty array if the user hasn't uploaded anything.
Register JavaScript callback from PHP:
Define JavaScript callback in JavaScript:
The first argument passed to the javascript callback is the array with the uploaded files. I.e.:
Configuration
Upload Target Path
As an alternative on using a server-side Callback for manually moving the uploaded files into the target destination path, a direct upload target path can be specified using the option target-path:
File count limit
You can specify how many files the user can upload by using the method Uploader::setUploadLimit():
File size limit
Restrict the upload to a maximum file size limit. The method accepts numeric or formatted string values, e.g.: 204800 or "204800b" or "200kb".
File extension restriction
Restrict the set of allowed file extensions to be uploaded through option allowed-extensions:
Technical Notes
Security
All files are primaraly being uploaded into a temporary session storage which is not accessible over HTTP(S). From there the files are either automatically being moved into the target upload path (if option target-path is set) or manually using a server-side callback-hanlder.
Note
Before files are added to the temporary session storage, their file names are sanitized as follows:
- Umlauts are transliterated
- Whitespace and non-latin characters are replaced by
_ - Names are truncated to a maximum length of 255 characters
- If the file extension is missing or is one of the following, the extension
.txtwill be attached:exe,bat,pif,com,vs,vbs,php,php4,php5,phps,cgi,pl,jsp,jspx,asp,aspx,jsp,jspx,jhtml,phtml,cfm,htaccess,py- If option Allow upload of client-side scripts is disabled (under Administration > Global Configuration > System > Security):
xhtml,xml,svg,shtml
Garbage Collection
Partially (incomplete) uploaded files are automatically flushed from the temporary session storage once they are older than 5 hours.